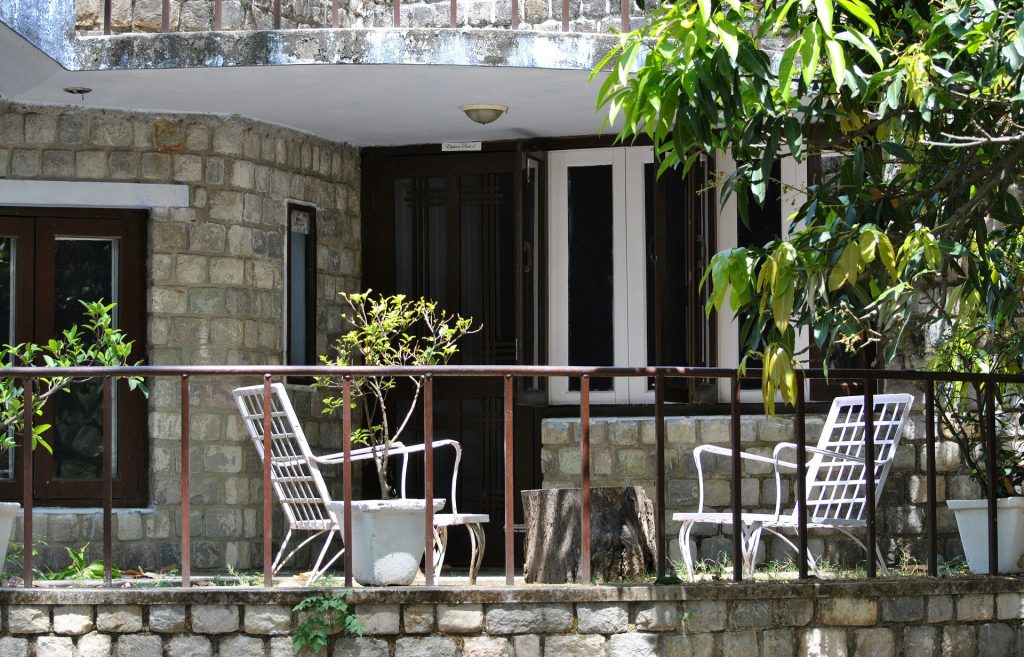
There’s nothing quite like unwinding by yourself Outdoor patio– up until the sun begins cooking you or the rainfall begins to fall. But you can easily double your time in the great outdoors with this gorgeous structure. Just think– say goodbye to rainouts throughout your next barbeque! As well as with a roof, you can loosen up on completely dry, clean, comfortable, padded furnishings, which just can not stand up to the components on an open patio. All in all, you can offer your outdoor patio the feeling and also feature of an outside living-room. But the best part is, this pavilion will certainly include actual elegance and worth to your home by dressing up that lonesome, underused area.
While this outdoor living-room style might look made complex to the newbie woodworker, do not be daunted. If you have the standard hand power devices, can manage a circular saw and also have a bit of remodeling experience, you have the moxie to pull off this task. We’ll show you some scribe-it, nail-it-up as well as cut-it-in-place strategies that significantly simplify the tough areas and also speed up the project. In fact, an additional carpenter as well as I built the basic framework in three leisurely days and spent a fourth day finishing the decorative column skirts. Give yourself and also a helper concerning twice as long as well as you may complete faster than you think.
Besides a carpenter’s apron equipped with the standard hand tools, all you require are a 4-ft. level, a circular saw, a jigsaw and posthole excavating tools. Yet take into consideration leasing a power nailer for a day to conserve time and effort for the large task of nailing down the roofing decking.
Contrasting the in the past as well as after images, you can see that along with building the pavilion, we did some major stonework and also growing. Those renovations apart, our complete materials bill was about $4,000.
Sandwich framework and also 2 × 6 tongue-and-groove outdoor decking construction
The style of this roof appears like standard post-and-beam building, yet without the frustrations of collaborating with hefty, pricey hardwood and also the challenging joinery that goes with it. The blog posts, beams, rafters as well as ceiling connections (see Figs. An and also B) are built-in-place sandwiches of usual 2 × 4, 2 × 6, 2 × 8 and also 2 × 10 smooth cedar lumber. The center board of each sandwich is 2 in. narrower than the external ones, which lends attractive darkness lines as well as architectural “heft” to the building.
This triple-thick setting up method makes the mounting participants extremely solid, which allows for longer spans and larger spacing between members. This strategy enables you to overlap and also lock all the assemble for an extremely solid framework, much easier nailing as well as tighter joints. And also, by constructing beams in layers, they’re lighter to lift. Given that the rafters are so husky, you can room them 32 in. apart. Yet those vast periods ask for a roof covering outdoor decking that can deal with those periods. Tongue-and-groove 2 × 6 decking (Image 18) fills the bill well since it’s really strong, moderately valued as well as simple to install. It additionally looks fantastic on the within. You can let end of the roofing system outdoor decking autumn arbitrarily throughout the roof covering; it’s trivial that they splice over framing participants. But the seams will look a lot more brightened if you utilize a block plane to sculpt a little chamfer on decking ends where two boards fulfill.
This flexible style is simple to tailor
We provide the fundamental measurements for the framework in Fig. A, yet don’t treat them as a reducing list, due to the fact that you’ll most likely have to adjust them to fit your own house. Adjusting sizes is easy. First you obtain the light beams as well as messages outlined as well as in position, after that you simply determine or scribe the remainder of the components for exact lengths or angles before cutting them to length and also setting up the parts. On your site, you may require to expand or grow the structure to miss windows or doors on the house or bridge over existing patio areas.
You can “grow” the size or size of the roof as much as 2 ft. without endangering structural honesty and also reduce it as high as you desire. The roof covering lines can additionally be altered to miss out on wall surface obstructions. We needed to steepen the roofing system incline on one side to miss the bay window you see in Photo 2. Under that home window, the roof has a 7/12 slope (7 in. of vertical decline for every 12 in. of straight distance), while the opposite side has a 6/12 slope. At a minimum, you need to attempt to have a 4/12 incline if you stay in a snowy location. Ask your structure inspector for minimum inclines for your location when you grab the building license. Yet remember that steeper pitches might require longer rafters and also more decking. You can identify needed product lengths when you go through the format exercise we show in Photos 1 as well as 2.
The simple means to identify the form and slope of your roofing system is to very first lay out the “footprint” of the messages as well as beam of lights utilizing the measurements we give you (Picture 1). Then use a 4-ft. level as well as a straight board to attract the light beam locations on the walls. The elevation of the bottom of the beam of lights need to be at least 6 ft. 8 in. for “headbanging” clearance (Picture 2). Tack 4-1/2 x 9-1/4 in. light beam layouts reduced from plywood to the wall surface to imitate light beams. After that outlined the roofing system lines with two 2x6s added through the exterior siding to make sure:
The rafter tails have a minimum of 6 ft. 8 in. of head clearance.
The roofing system contends least a 4/12 slope.
The windows, bays or various other wall projections are spaced at the very least 5 in. over the rafters to leave area for flashing.
This is the moment to make last changes to the roof covering incline and the post-and-beam places. If everything seems OK, you can begin digging your grounds (Picture 3).
Foundation-grade posts and also drifting base skirts
Use.60 foundation-grade treated 2x4s and 2x6s for the reduced blog post sections and the grounds (Fig. B). You might need to special-order them, however the added durability is worth the money and also difficulty. For the above-ground base skirt framework and also sheathing, standard.40 dealt with product will certainly work simply fine.
The base skirts are developed to “float,” that is, move up and down the fixed messages that they frame. That’s particularly important when they rest on a piece or rock surface in cold areas where frost can raise patio areas when the ground ices up. The skirts can move up as well as down during freeze/thaw cycles, but the posts, which extend listed below frost depth, sit tight– without lifting the entire structure. So when you structure and cut the pilaster base skirts, ensure every little thing fits freely.
If the messages need to penetrate a concrete or rock surface area, cut a 20- in. square hole for digging the grounds (Photo 3). Make use of a round saw with a ruby blade and also don’t stress over making it pretty; the skirt will certainly cover the hole. To prevent settling, simply make sure to pack the soil well as you backfill around the messages.
Bracing as you develop
We show a secure technique of placing your outdoor living room messages so they’re square as well as spaced perfectly from the house and each other. The technique is to make use of a jig made from the framework materials (called a “footprint theme” in Image 1). Initially tack the posts to the jig (Image 3, inset) and after that later on per other (Photo 9). Continuously inspect the messages throughout the building and construction to keep everything square and plumb and you’ll make your life much easier as you put together the top parts.
The ridge assembly is particularly complicated to facility and support before the rafters are in place. Make use of the rafter mockup (Photo 2) to determine the height of the bottom of the ridge as well as tack a temporary 2 × 6 support against your home to sustain that end of the ridge (Picture 9). The momentary brace that supports the backyard end of the ridge will certainly probably be taller to suit any drainage incline on the patio area. Cut that support a few inches much longer, tack it in position as well as utilize a long, straight board and also level from the top of the house-mounted assistance to note the size. After that cut it to length as well as use existing and extra supports to hold it in place prior to you set the ridge. A couple of 2x4s toenailed to the outdoors as well as a number of braces will certainly keep the ridge from slipping off the support while you’re mounting the rafters. We put together the ridge sandwich on the ground and raised it into location, but it was a struggle for the two of us! It ‘d be much easier to lift the boards individually and nail them together as soon as they’re up.
After the ridge is constructed, procedure from the ridge edges to the light beams on each wall surface. To focus the ridge perfectly, change the ridge up until the right and also left dimensions coincide. Keep in mind that if you need to develop an offset roofing system as we did, the ridge will no more be specifically centered, however you still need to make it parallel to the beams.
Ending up
Whichever wood types you pick, think ahead as well as prefinish the timber whenever feasible– specifically if the roofing decking sporting activities a different coating than the framework. We put 2 coats of outside latex tarnish on the outdoor decking before installing it. That conserved tons of time over painstakingly cutting in cleanly around the framing. For the very same reason, it pays to use an outside sealer on the cedar after the structure is up and in the past mounting the decking. If you’re discoloring or painting basic mounting lumber, we suggest using the surface prior to setting up the structure and afterwards repairing nail openings and also end cuts after construction. You’ll obtain a much better, faster paint job and also the wood surface areas that are buried inside sandwiches will be better secured from wetness in your outdoor living room.